# API Keys (/docs/guides/authentication/api-keys)
# 🔑 API Keys [#-api-keys]
Hands In uses API keys to authenticate all API requests. This guide walks you through how to locate your API keys, use them to authorize API calls, and follow security best practices.
## 1️⃣ Finding Your API Keys [#1️⃣-finding-your-api-keys]
To retrieve your API keys:
1. Log in to the [Hands In dashboard](https://app.handsin.com) and open your merchant.
2. Use the **Test** / **Live** switch in the top bar to choose the environment you want keys for.
3. Open **Developers** in the sidebar. The **API keys** tab is shown first.
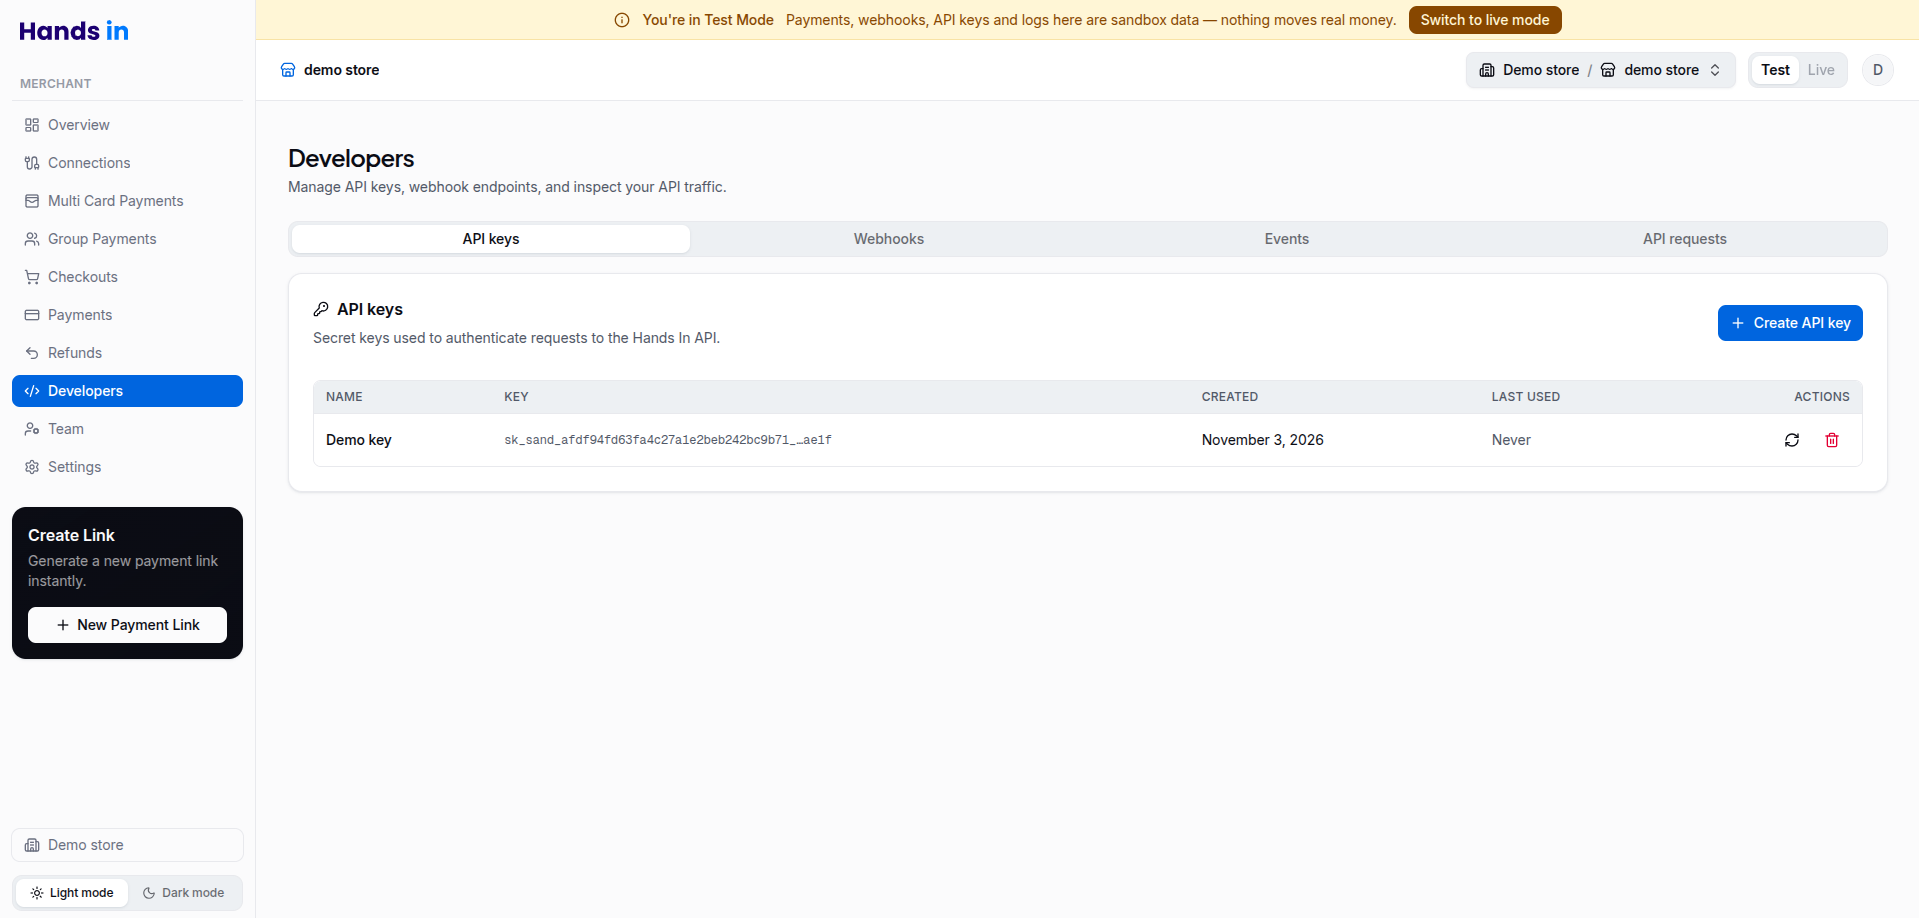
Keys belong to the environment you are viewing:
* **Test mode keys** – for testing requests against the sandbox environment
* **Live mode keys** – for processing real transactions in production
The list shows each key's name, a masked version of the key, when it was created and when it was last used.
To create a key:
1. Click **Create API key**.
2. Enter a name, and optionally a description, then click **Create key**.
3. Copy the key straight away and click **Done**.
**For security, the full key is only shown once, when you create it.**\
If you lose it, use **Rotate** on that key to generate a new one. The old key stops working immediately.
You can also **Delete** a key. Any integration using it stops working immediately.
**Be sure to copy the correct key for the environment you're working in.**\
A sandbox key used on the live API (or vice versa) will result in an authentication error.
## 2️⃣ Using API Keys in Requests [#2️⃣-using-api-keys-in-requests]
Include your API key in the `x-api-key` header for every API request.
```bash
curl --request POST \
--url https://api.sandbox.handsin.com/v1/multi-card-payments \
--header "Accept: application/json" \
--header "Content-Type: application/json" \
--header "x-api-key: " \
--data '{
"amountMoney": {
"currency": "GBP",
"amount": 50000
},
"idempotencyKey": ""
}'
```
```javascript
const url = "https://api.sandbox.handsin.com/v1/multi-card-payments";
const payload = {
amountMoney: {
currency: "GBP",
amount: 50000
},
idempotencyKey: ""
};
try {
const response = await fetch(url, {
method: "POST",
headers: {
"Accept": "application/json",
"Content-Type": "application/json",
"x-api-key": ""
},
body: JSON.stringify(payload)
});
if (!response.ok) {
throw new Error(`Response status: ${response.status}`);
}
const data = await response.json();
console.log(data);
} catch (error) {
console.error("Request failed:", error.message);
}
```
```python
import requests
url = "https://api.sandbox.handsin.com/v1/multi-card-payments"
headers = {
"Accept": "application/json",
"Content-Type": "application/json",
"x-api-key": ""
}
payload = {
"amountMoney": {
"currency": "GBP",
"amount": 50000
},
"idempotencyKey": ""
}
try:
response = requests.post(url, headers=headers, json=payload)
response.raise_for_status()
print(response.json())
except requests.exceptions.RequestException as e:
print(f"Request failed: {e}")
```
```powershell
$headers = @{
"Accept" = "application/json"
"Content-Type" = "application/json"
"x-api-key" = ""
}
$body = @{
amountMoney = @{
currency = "GBP"
amount = 50000
}
idempotencyKey = ""
} | ConvertTo-Json -Depth 3
try {
$response = Invoke-RestMethod -Uri "https://api.sandbox.handsin.com/v1/multi-card-payments"
-Method POST -Headers $headers -Body $body
$response
} catch {
Write-Host "Request failed: $($_.Exception.Message)"
}
```
Replace `` with your actual sandbox or live key depending on the target environment.
***
## 🔐 API Key Best Practices [#-api-key-best-practices]
Follow these security guidelines to protect your API keys and your customers:
* **Keep them secret**: Never share your API keys or expose them in frontend code.
* **Use environment variables**: Avoid hardcoding keys in source files or committing them to version control.
* **Regenerate if compromised**: If a key is exposed or leaked, revoke it immediately and generate a new one.
* **Use the right key for the right environment**: Sandbox and live keys are **not interchangeable**.
***
## ⚠️ Troubleshooting Key Errors [#️-troubleshooting-key-errors]
If you receive a `401 Unauthorized` or `403 Forbidden` response:
* Ensure you're using the correct API key for the environment.
* Double-check that the `x-api-key` header is included and spelled correctly.
* Confirm the merchant key hasn't been deleted or disabled.